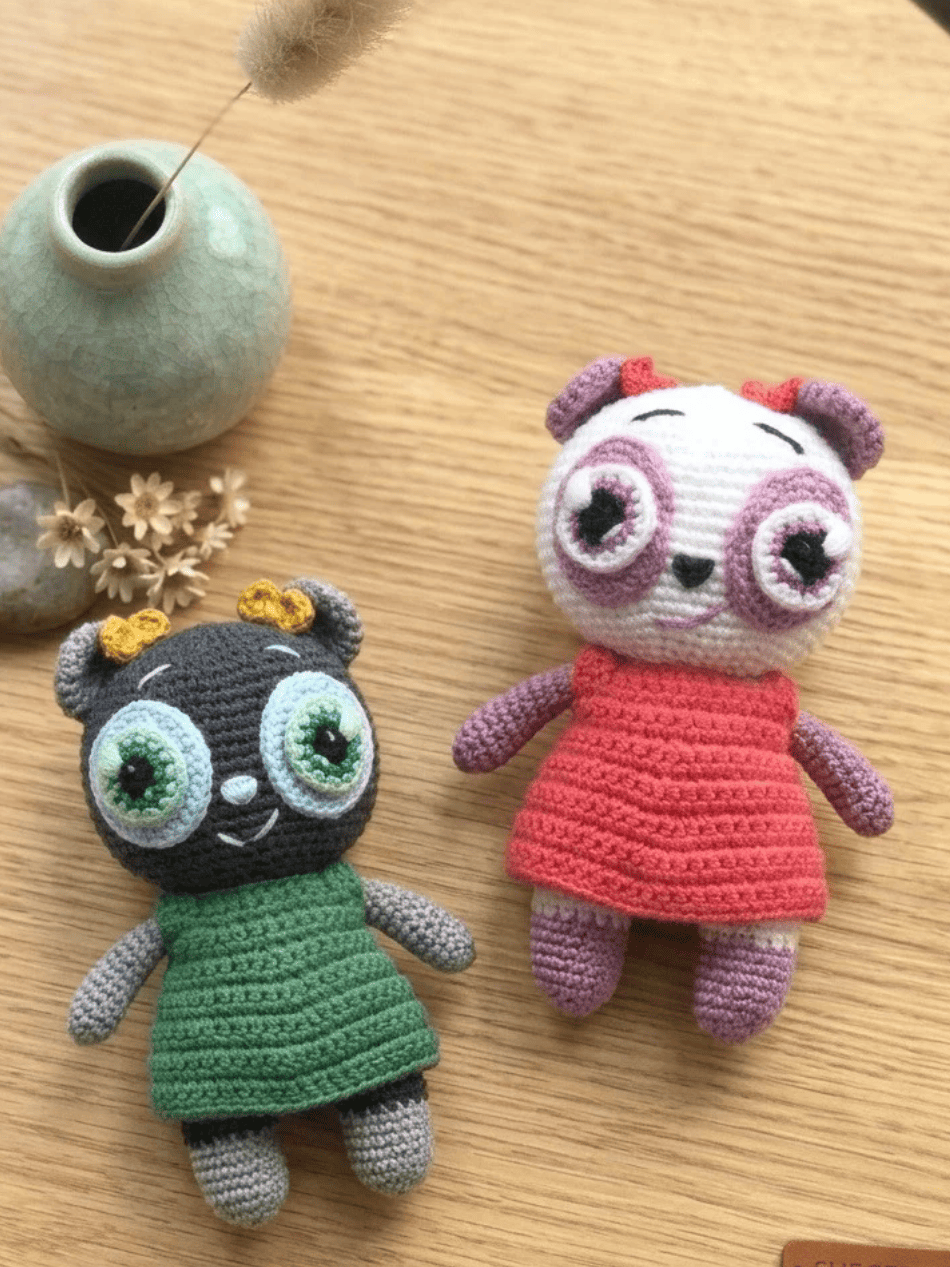
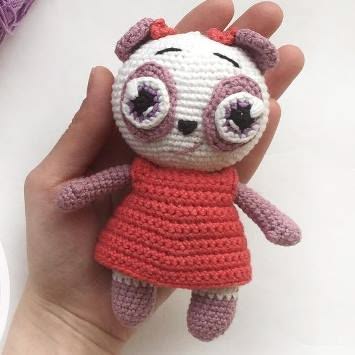
Mochi the Panda has the sweetest little sleepy expression, and that sideways glance gives her so much personality before you even add the outfit. Her round head, tiny ears, dark eye patches, and little red flowers make her feel soft, gentle, and a little fancy all at once. I especially love how the red dress adds a bright pop of color against the classic black-and-white panda look.
This pattern is a little more detailed than a basic amigurumi project, but that is part of what makes it fun. You will work with three hook sizes and make a proper raglan-style dress, so there are a few extra steps to enjoy along the way. Nothing is too difficult, but taking your time with the eye placement and clothing will really help Mochi look polished.
If you enjoy amigurumi dolls with tiny outfits and expressive faces, Mochi is a beautiful one to make. The dress, flower details, and sleepy eyes give her a keepsake feel that makes the finished panda look extra special. She would make a lovely handmade gift, nursery decoration, or sweet little addition to your crochet collection.
Materials Needed
- Yarn (such as YarnArt Jeans) in white, for the body, part of the legs, and the head
- Yarn in dark pink or mauve, for the arms, part of the legs, ears, tail, and eye patches
- Yarn in red, for the dress and the flowers
- Small amounts of black, purple, and white yarn, for the eyes
- Crochet hooks in three sizes: 2.25mm, 3mm, and 1.6mm
- Scissors and a yarn needle
- Polyester fiberfill stuffing
- Embroidery thread, for the nose, eyebrows, smile, and eye highlights
Abbreviations Used
- MR: magic ring
- ch: chain stitch
- sc: single crochet
- sl st: slip stitch
- hdc: half double crochet
- inc: increase (2 sc in the same stitch)
- dec: decrease (2 sc worked together)
- puff st: puff stitch, several loops pulled up in one stitch and closed together as a single stitch
- raglan inc: a 3 sc increase worked into a single stitch, used to shape the raglan seams on the dress
- (number): total stitch count at the end of the round
Pattern Notes
- The legs, body, and head are all worked as one continuous piece. Only the arms are made separately, and they get crocheted directly into the body as you go rather than sewn on afterward.
- Two small offset techniques show up on the arms, where you deliberately leave a stitch or two unworked at the end of a round before folding and closing the piece. That’s meant to shift where the final seam lands, so follow it even though it feels like stopping a round short.
- The dress is worked top down in raglan style using turned rows rather than continuous rounds, and includes a short section where you chain over the underarm stitches to separate the sleeves from the body. Keep an eye on when the pattern says to turn versus just continue around.
- Three different hook sizes come into play here, a mid size for the body and limbs, a larger one for the dress, and a much smaller one for the eyes and flowers, so have all three on hand rather than trying to compensate with yarn weight alone.
Pattern Instructions
Right Arm
Worked in dark pink.
- Round 1: 6 sc in MR (6)
- Round 2: (sc, inc) x3 (9)
- Round 3: (2 sc, inc) x3 (12)
- Round 4: 12 sc (12)
- Round 5: 5 sc, 1 puff st, 6 sc (12)
- Round 6: (2 sc, dec) x3 (9)
- Rounds 7-14 (8 rounds): 9 sc (9)
- Round 15: 3 sc, dec, 4 sc (8)
- Round 16: 6 sc, leaving the last 2 sc of the round unworked to shift the seam
- Stuff lightly, fold flat, and work 3 sc together through both thicknesses to close.
Left Arm
Worked in dark pink.
- Round 1: 6 sc in MR (6)
- Round 2: (sc, inc) x3 (9)
- Round 3: (2 sc, inc) x3 (12)
- Round 4: 12 sc (12)
- Round 5: 5 sc, 1 puff st, 6 sc (12)
- Round 6: (2 sc, dec) x3 (9)
- Rounds 7-14 (8 rounds): 9 sc (9)
- Round 15: dec, 7 sc (8)
- Round 16: 7 sc, leaving the last sc of the round unworked to shift the seam
- Stuff lightly, fold flat, and work 3 sc together through both thicknesses to close.
Legs (make 2), continuing into the Body and Head
Start the legs in dark pink.
- Round 1: 6 sc in MR (6)
- Round 2: inc x6 (12)
- Round 3: (3 sc, inc) x3 (15)
- Rounds 4-9 (6 rounds): 15 sc (15)
Switch to white.
- Round 10: 15 sc (15)
- Cut the yarn on the first leg, and continue with the yarn attached to the second leg.
Join the two legs with a 5 chain.
- Round 11: work 15 sc across the first leg, 5 sc along the chain, 15 sc across the second leg, 5 sc along the chain (40)
- Round 12: 15 sc, inc, 3 sc, inc, 20 sc (42)
- Rounds 13-15 (3 rounds): 42 sc (42)
Switch to dark pink.
- Rounds 16-19 (4 rounds): 42 sc (42)
- Round 20: (5 sc, dec) x6 (36)
- Rounds 21-24 (4 rounds): 36 sc (36)
- Round 25: (4 sc, dec) x6 (30)
- Round 26: 30 sc (30)
- Round 27: (3 sc, dec) x6 (24)
- Round 28: 24 sc (24)
- Round 29: attach the arms as you work this round: 6 sc, hold the left arm against the body and work 3 sc through both together, 10 sc, hold the right arm against the body and work 3 sc through both together, 2 sc
- Round 30: (2 sc, dec) x6 (18)
- Stuff the body and legs.
Switch to white for the head.
- Round 31: (2 sc, inc) x6 (24)
- Round 32: (3 sc, inc) x6 (30)
- Round 33: (4 sc, inc) x6 (36)
- Round 34: (5 sc, inc) x6 (42)
- Round 35: 10 sc, inc, (3 sc, inc) x2, 12 sc, inc, (3 sc, inc) x2, 2 sc (48)
- Round 36: (7 sc, inc) x6 (54)
- Round 37: 54 sc (54)
- Round 38: (8 sc, inc) x6 (60)
- Round 39: 60 sc (60)
- Round 40: (9 sc, inc) x6 (66)
- Rounds 41-43 (3 rounds): 66 sc (66)
- Round 44: (9 sc, dec) x6 (60)
- Round 45: 60 sc (60)
- Round 46: (8 sc, dec) x6 (54)
- Round 47: 54 sc (54)
- Round 48: (7 sc, dec) x6 (48)
- Round 49: 48 sc (48)
- Round 50: (6 sc, dec) x6 (42)
- Round 51: 42 sc (42)
- Round 52: (5 sc, dec) x6 (36)
- Round 53: (4 sc, dec) x6 (30)
- Round 54: (3 sc, dec) x6 (24). Stuff the neck firmly here, and shape the head into an oval as you continue stuffing.
- Round 55: (2 sc, dec) x6 (18)
- Round 56: (sc, dec) x6 (12)
- Round 57: dec x6 (6)
- Finish stuffing, cinch the opening closed, and cut the yarn.
Ears (make 2)
Worked in dark pink.
- Round 1: 6 sc in MR (6)
- Round 2: inc x6 (12)
- Round 3: (sc, inc) x6 (18)
- Round 4: 18 sc (18)
- Round 5: (sc, dec) x6 (12)
- Fold flat and work 6 sc together through both thicknesses to close.
Tail
Worked in dark pink.
- Round 1: 6 sc in MR (6)
- Round 2: (sc, inc) x3 (9)
- Round 3: 9 sc (9)
Eye Patches (make 2)
Worked in dark pink.
- Round 1: chain 7, work into the 2nd chain from the hook: 5 sc, work 3 sc into the last chain, then along the other side work 4 sc, work 2 sc into the last stitch (14)
- Round 2: (inc, sc) x7 (21)
- Round 3: (inc, 2 sc) x7 (28)
- Round 4: (inc, 3 sc) x3, sl st, leaving the rest of the round unworked. Fasten off, leaving a tail for sewing.
Eyes (make 2)
Start in black, with the 1.6mm hook.
- Round 1: 5 sc in MR (5)
- Round 2: inc x5 (10)
Switch to purple.
- Round 3: (sc, inc) x5 (15)
Switch to white.
- Round 4: (2 sc, inc) x5 (20)
- Embroider a couple of small highlight stitches once the eyes are attached.
Dress
Worked in red, with the 3mm hook, top down in raglan style using turned rows.
Chain 20 plus 1 turning chain. Distribute the stitches as 6 for the back, 2 for each sleeve, 6 for the front, and 4 raglan points.
- Row 1: 3 sc, raglan inc, 2 sc, raglan inc, 6 sc, raglan inc, 2 sc, raglan inc, 3 sc.
- Row 2: ch 1, turn, 4 sc, raglan inc, 4 sc, raglan inc, 8 sc, raglan inc, 4 sc, raglan inc, 4 sc.
- Row 3: ch 1, turn, 5 sc, raglan inc, 6 sc, raglan inc, 10 sc, raglan inc, 6 sc, raglan inc, 5 sc.
The next row separates the sleeves from the body.
- Row 4: ch 1, turn, 7 sc, ch 4, skip 8 sc, work into the 9th stitch from the hook: 14 sc, ch 4, skip 8 sc, work into the 9th stitch from the hook: 7 sc (36)
- Row 5: ch 1, turn, 36 sc (36)
- Row 6: ch 1, turn, (8 sc, inc) x4 (40)
- Row 7: ch 1, turn, 40 sc (40)
- Row 8: ch 1, turn, (inc, 9 sc) x4 (44)
- Row 9: ch 1, turn, 44 sc (44)
- Row 10: ch 1, turn, (10 sc, inc) x4 (48)
- Row 11: ch 1, turn, 48 sc (48)
- Row 12: ch 1, turn, (inc, 11 sc) x4 (52)
- Rows 13-15 (3 rows): 52 sc (52)
- Put the dress on your panda and sew it closed at the back.
Flowers (make 2)
Worked in red, with the 1.6mm hook.
- Round 1: 5 sc in MR (5)
- Round 2: (sl st, ch 2, hdc) x5
- Fasten off, leaving a tail for sewing.
Assembly
Sew the ears onto the head and the tail onto the lower back. Sew each eye onto its eye patch, shifting the eye toward the bottom right corner of the patch rather than centering it, that off center placement is exactly what gives Mochi her sleepy, sideways glance. Once the eyes are attached, sew the finished eye patches onto the head in the usual panda position, then embroider a small nose, a pair of eyebrows, and a gentle smile below them.
Put the dress on over the body and sew it closed along the back seam, then finish by sewing the two flowers onto the head, tucked near one ear the way they sit in the photo.
Tips & Tricks
- Work the puff stitch on the arms a little looser than your regular single crochet, a tight puff stitch can pull the row around it out of shape.
- Test the eye placement on the patches before committing to sewing, laying the eye piece loosely in a few spots and comparing against the photo makes it much easier to land that sleepy corner glance.
- Keep track of which rows say to turn and which say to continue around, especially moving between the raglan section and the body of the dress, it’s an easy place to lose your rhythm if you’re used to working in continuous rounds.
- Label or set aside your three hooks by section before you start, jumping between a 2.25mm, a 3mm, and a 1.6mm over the course of one project is easy to fumble if they’re all loose in the same bag.
Frequently Asked Questions
What’s the puff stitch and where does it go?
The puff stitch is made by pulling up several loops in one stitch and closing them together as a single stitch. In this pattern, one puff stitch is worked in Round 5 of each arm. Keep it slightly looser than your regular single crochet so it does not pull the surrounding stitches out of shape.
Why are the arms crocheted separately but the body is one piece?
The arms are prepared separately first, but they are attached directly while crocheting Round 29 of the body. The legs, body, and head continue as one piece, which reduces the amount of sewing needed during final assembly.
What’s the point of shifting the eyes toward the bottom right corner of the patches?
The off-center eye placement creates Mochi’s sleepy sideways expression. Before sewing, place each eye loosely on its patch and adjust the position until both sides give you the expression you want.
Conclusion
Mochi takes a bit more patience than a simple round bodied toy, between the continuous shaping, the offset seams, and that little raglan dress, but every one of those details is what gives her such a specific, sleepy charm once she’s finished. She’s a lovely project for anyone ready to stretch their amigurumi skills a little further, and that sideways glance makes the extra effort worth it.
