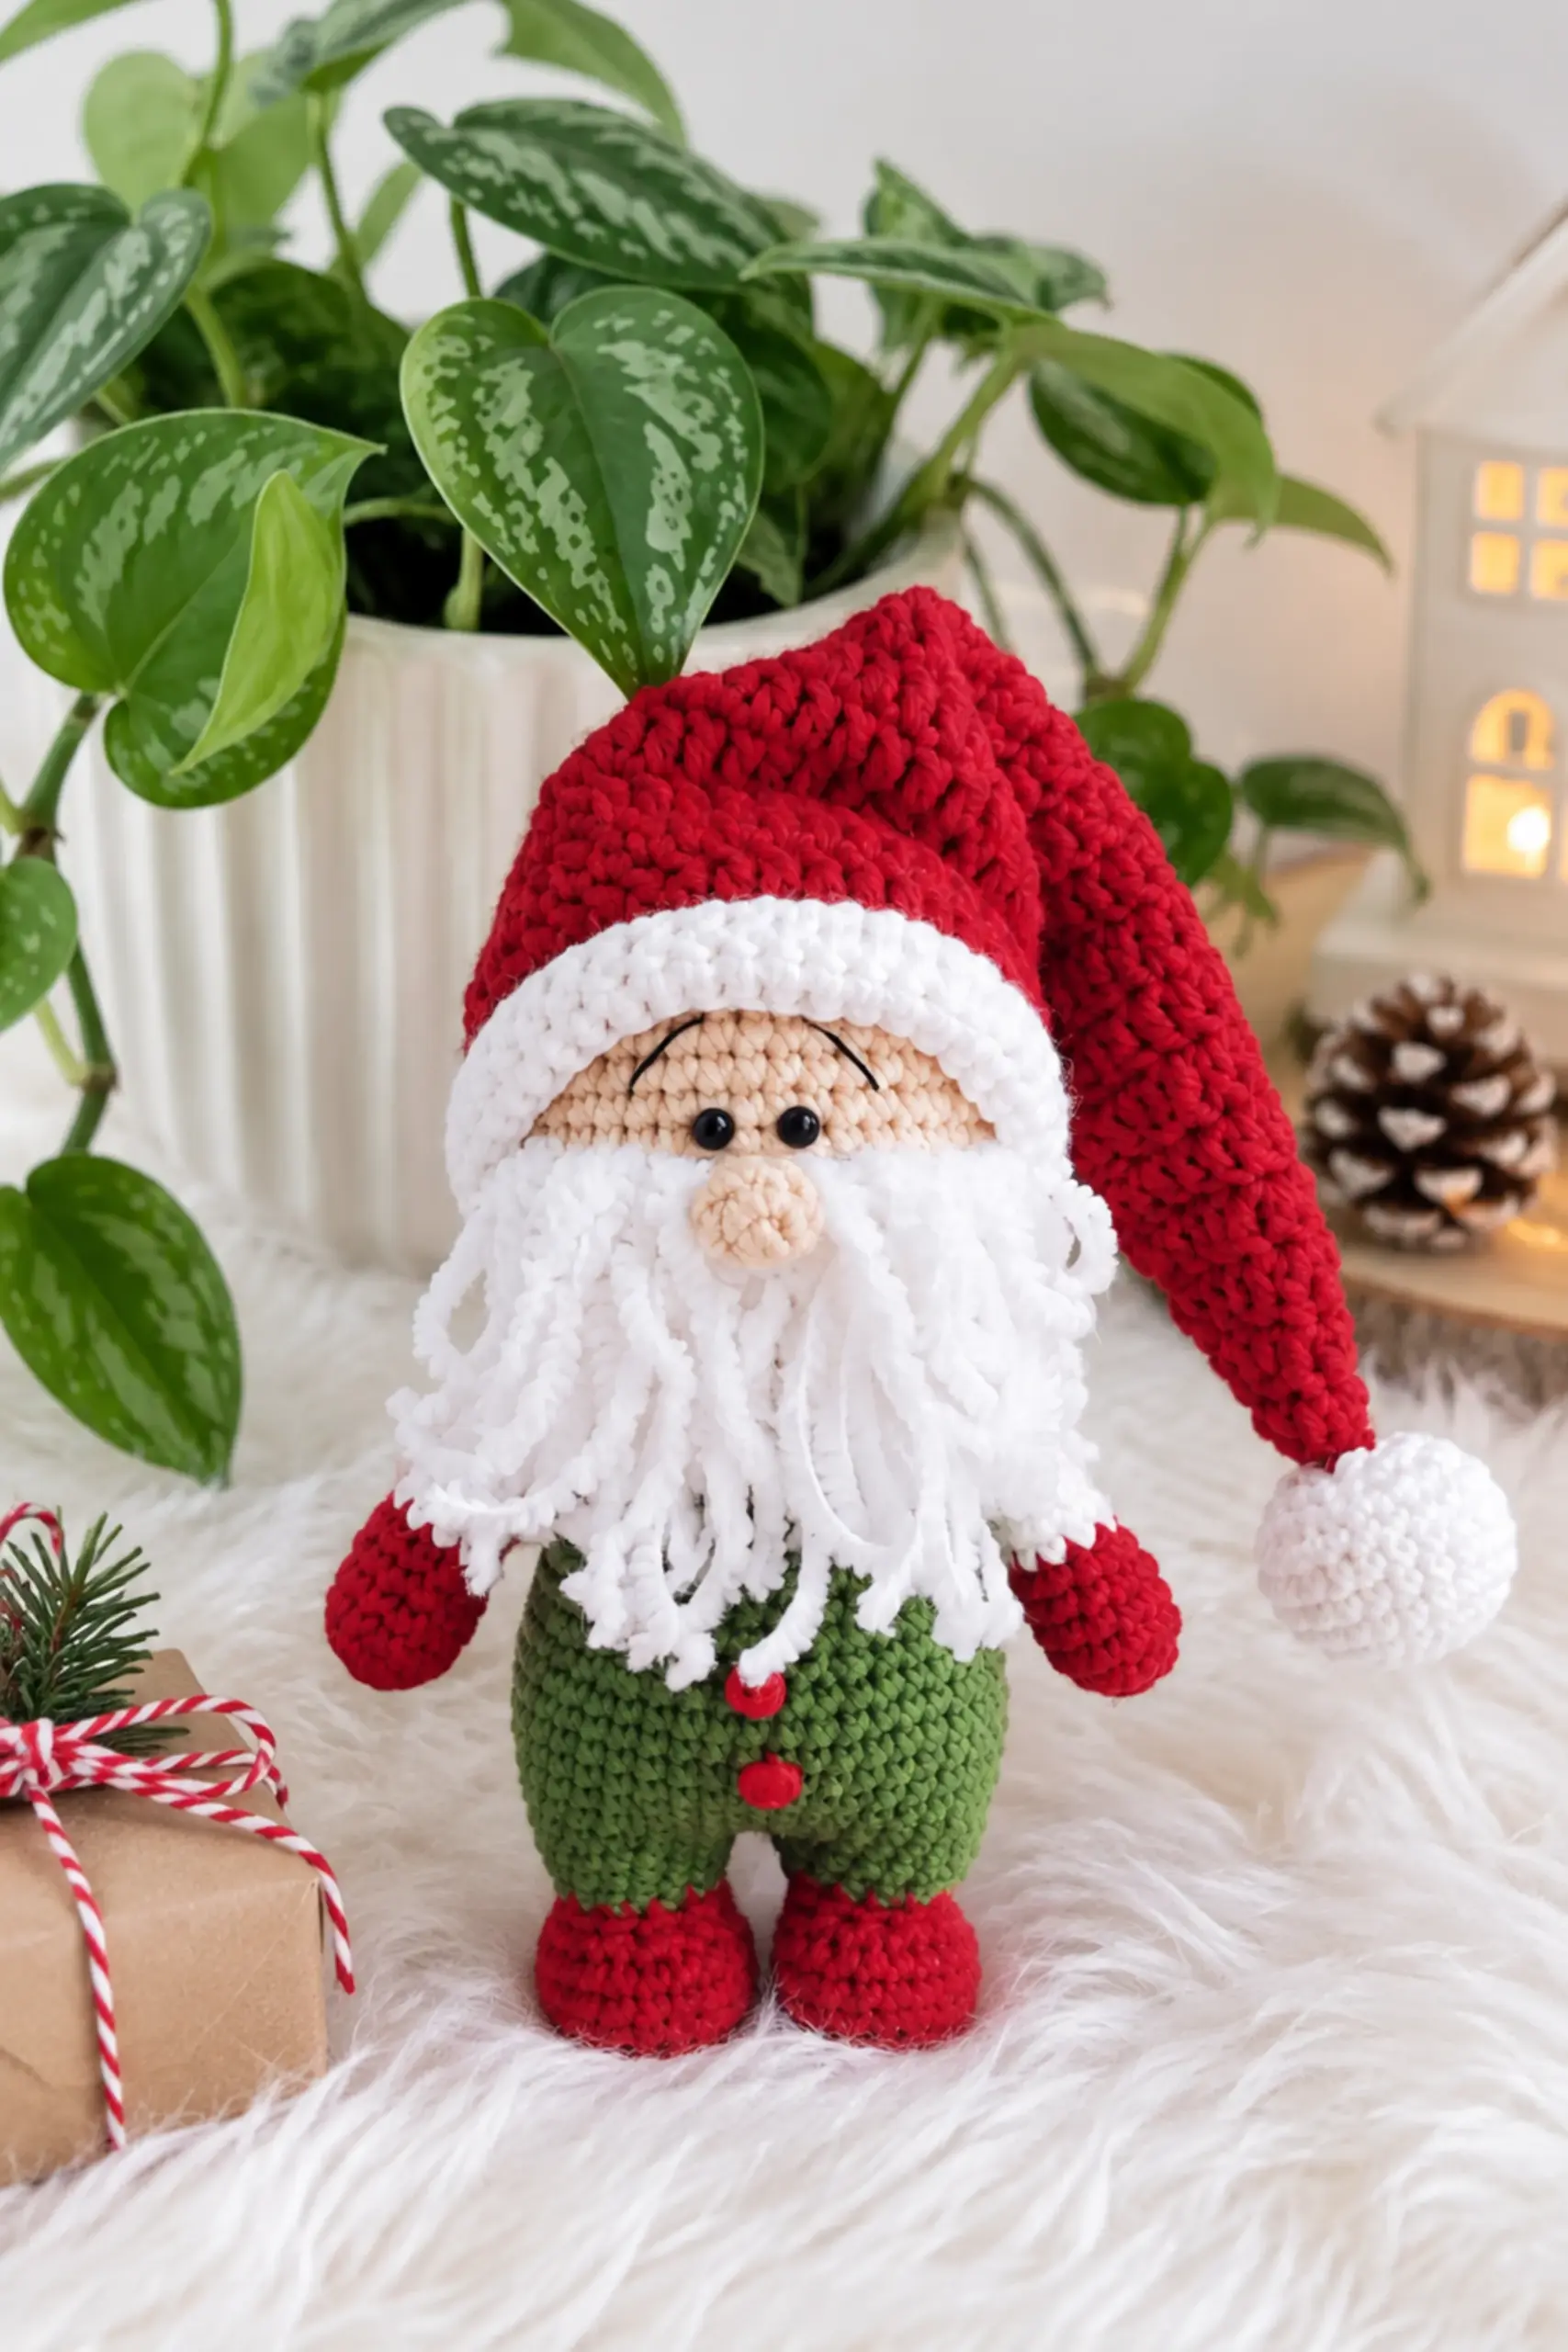
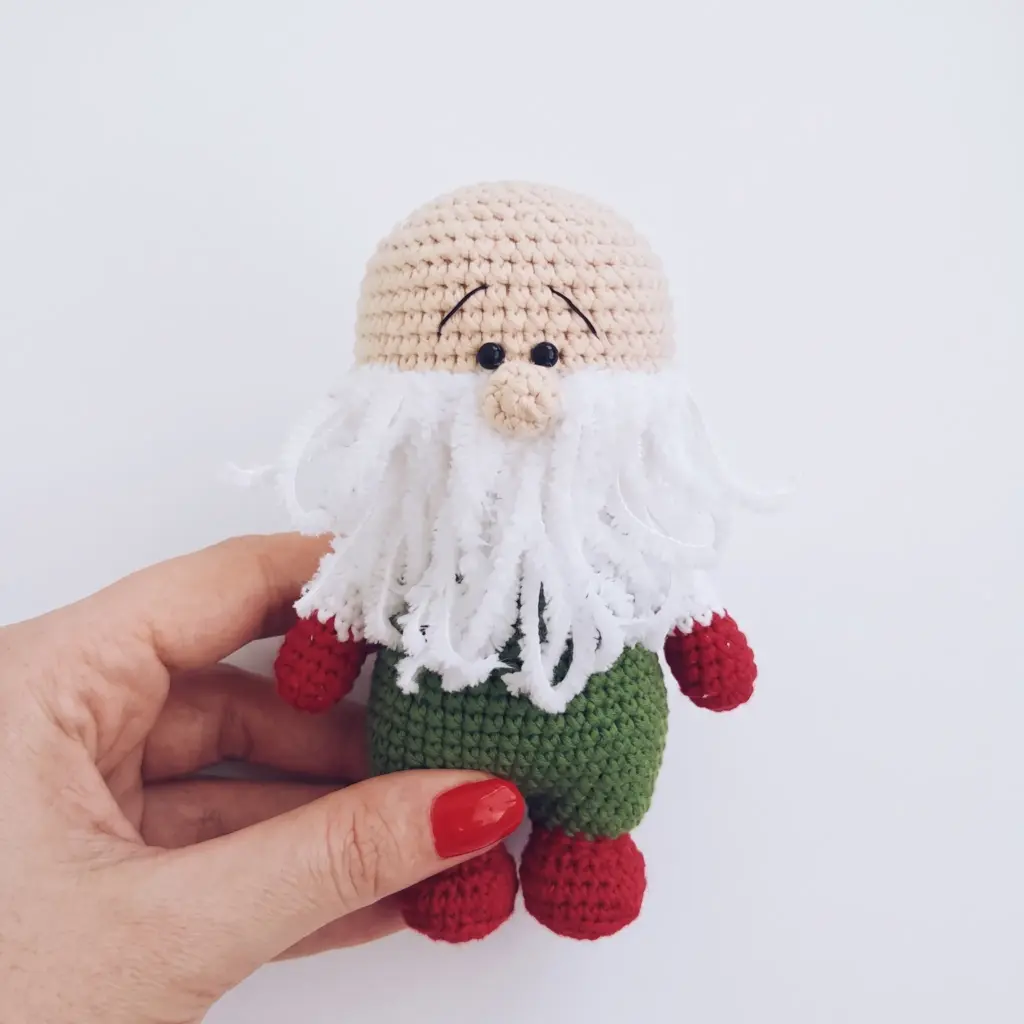
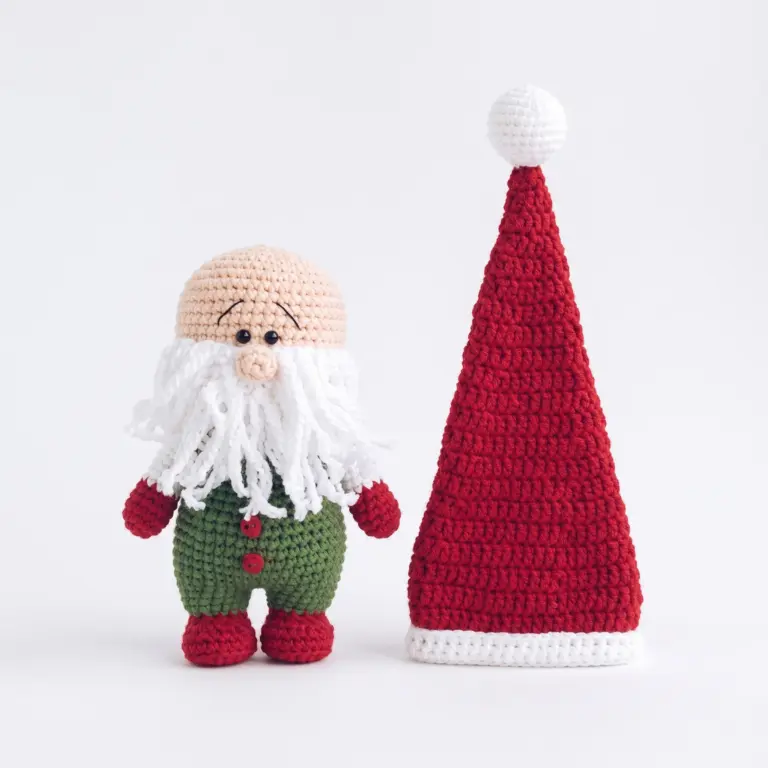
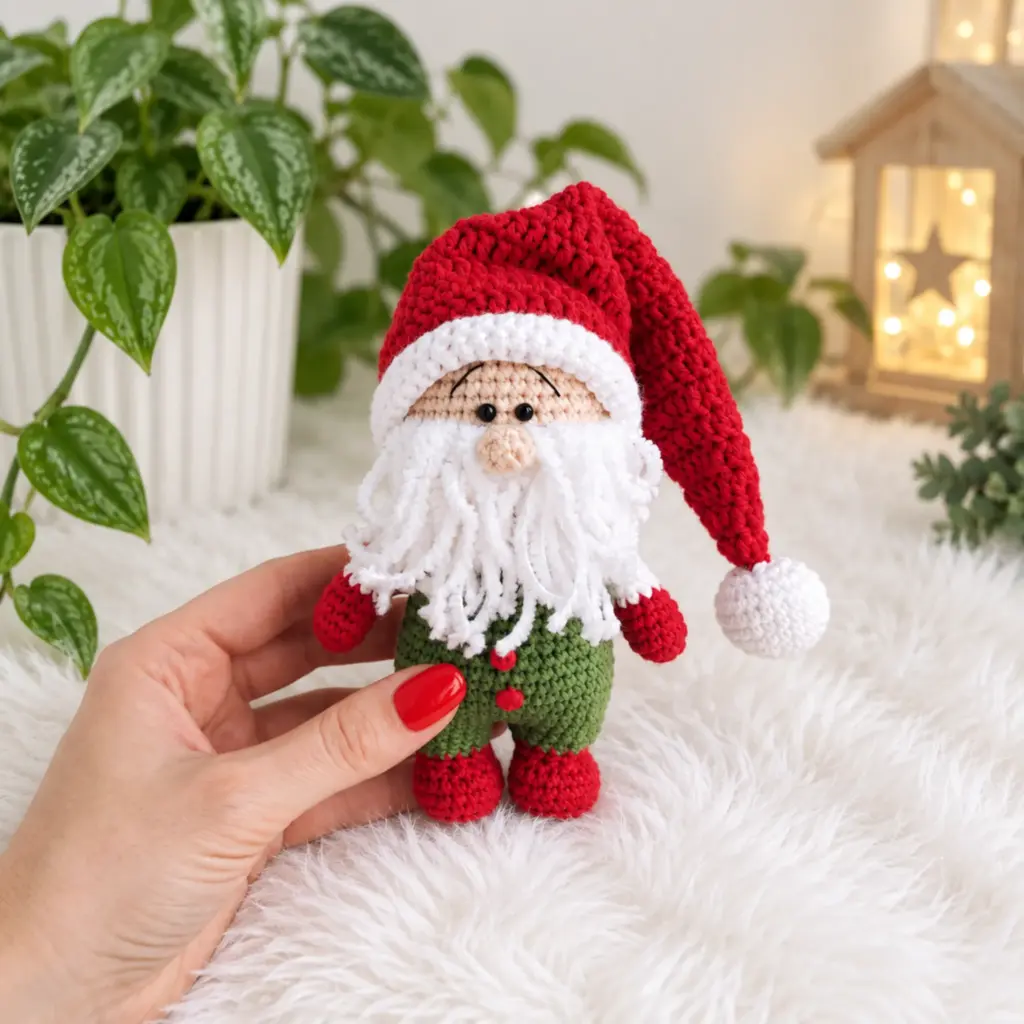
This cheerful Christmas gnome is a cozy little holiday project, complete with a long red hat, fluffy white beard, tiny boots, and classic festive colors. The pattern is best suited to crocheters who are comfortable working amigurumi in the round, changing colors, shaping with increases and decreases, and sewing small pieces together.
Grab your hook, choose your favorite Christmas colors, and follow the pattern below to make your own handmade gnome for seasonal decorating or gifting.
Jump to Pattern ↓About This Christmas Gnome
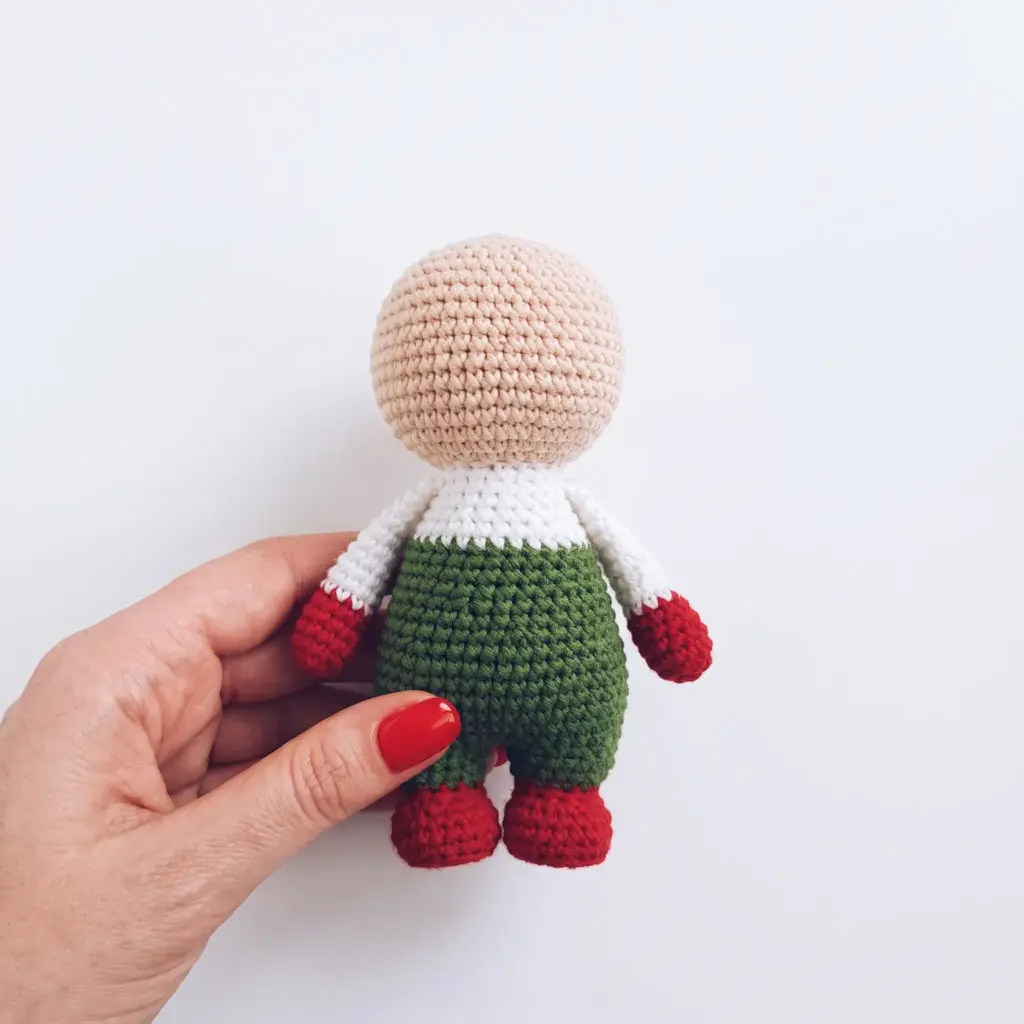
The finished gnome measures approximately 5 inches (13 cm) tall, excluding the hat. The legs, body, and head are worked into one main piece, while the arms, nose, hat, and pom-pom are made separately and attached during finishing.
What You’ll Need
- Worsted weight cotton yarn in Dark Red, Green, Light Beige, and White
- A small amount of fuzzy white yarn for the beard
- 2 mm crochet hook (B-1/C-2)
- Polyester fiberfill
- Two 4 mm safety eyes or black beads
- Two 6 mm decorative buttons
- Tapestry or yarn needle
- Stitch marker
- Scissors and straight pins
- Optional: two small plastic circles cut to fit the soles
Stitches & Abbreviations
- BLO — Back Loop Only
- ch — Chain
- dc — Double Crochet
- dec — Invisible Decrease
- FLO — Front Loop Only
- inc — Increase (2 sc in the same stitch)
- mr — Magic Ring
- sc — Single Crochet
- sl st — Slip Stitch
- st(s) — Stitch(es)
Pattern Notes
- US crochet terminology is used throughout.
- Use a stitch marker to keep track of the beginning of your rounds.
- Keep your stitches tight enough that the stuffing does not show through.
- Stitch totals are shown in parentheses.
- Stuff the legs and body firmly as you work.
- Stuff the lower arms firmly, use less stuffing toward the middle, and leave the tops unstuffed for easier sewing.
- The hat is worked in joined rounds rather than a continuous spiral.
Christmas Gnome Crochet Pattern
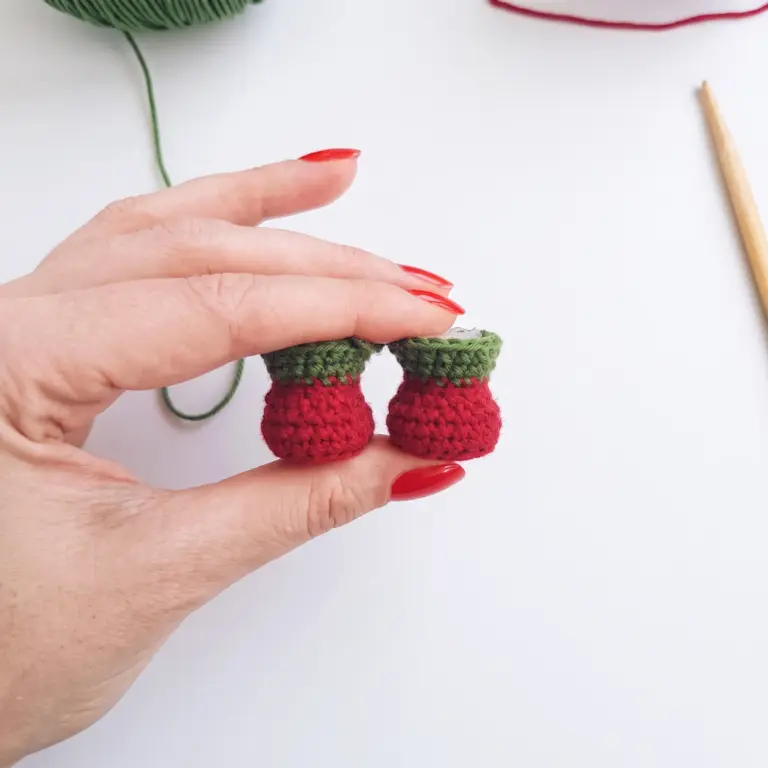
Leg 1
Start with Dark Red.
- Rnd 1: 6 sc in mr. (6)
- Rnd 2: inc in each st around. (12)
- Rnd 3: (1 sc, inc) repeat 6 times. (18)
If you are adding plastic soles, trace and cut them before continuing.
- Rnd 4: sc BLO around. (18)
- Rnds 5–6: sc around. (18)
Insert the optional plastic sole now.
- Rnd 7: dec 6 times, then sc 6. (12)
- Rnd 8: sc around. (12)
Change to Green.
- Rnd 9: (1 sc, inc) repeat 6 times. (18)
- Rnds 10–11: sc around. (18)
Sl st to join. Fasten off and weave in the end.
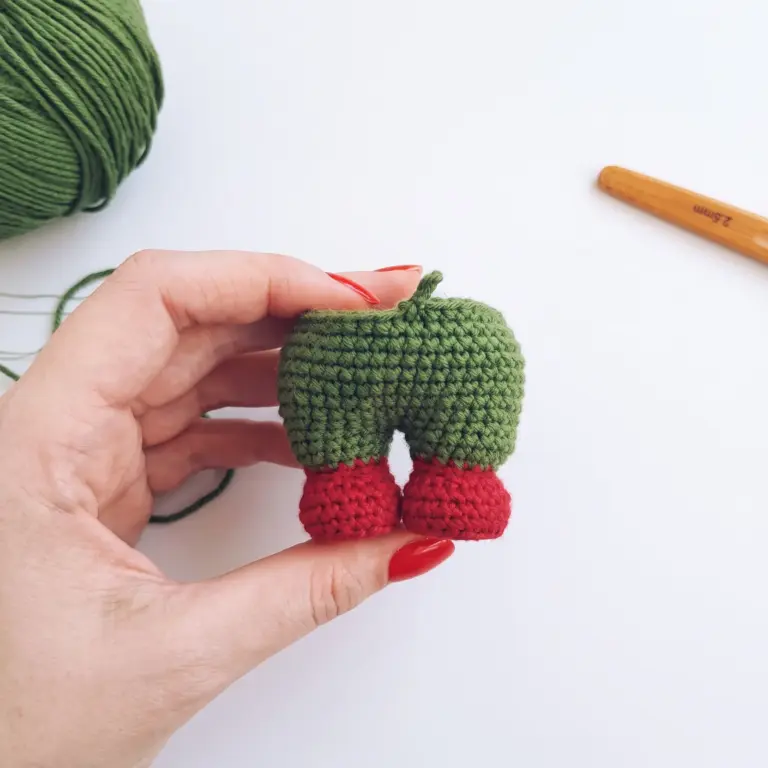
Leg 2
Start with Dark Red.
- Rnd 1: 6 sc in mr. (6)
- Rnd 2: inc around. (12)
- Rnd 3: (1 sc, inc) repeat 6 times. (18)
- Rnd 4: sc BLO around. (18)
- Rnds 5–6: sc around. (18)
- Rnd 7: sc 6, then dec 6 times. (12)
- Rnd 8: sc around. (12)
Change to Green.
- Rnd 9: (1 sc, inc) repeat 6 times. (18)
- Rnds 10–11: sc around. (18)
Do not fasten off. Work 20 more sc across Leg 2. Place both legs side by side with the Round 7 decrease sections facing forward.
Joining the Legs & Body
- Rnd 12: Join Leg 1 and work 18 sc across Leg 1, then 18 sc across Leg 2. (36)
- Rnd 13: (5 sc, inc) repeat 6 times. (42)
- Rnds 14–19: sc around. (42)
- Rnd 20: (5 sc, dec) repeat 6 times. (36)
- Rnds 21–22: sc around. (36)
- Rnd 23: 2 sc, dec, (4 sc, dec) ×5, 2 sc. (30)
- Rnds 24–25: sc around. (30)
Move the stitch marker to the side of the body by working approximately 8 sc, or as many as necessary. Change to White. This becomes the new beginning of the round.
- Rnd 26: sc BLO around. (30)
- Rnd 27: sc around. (30)
- Rnd 28: (3 sc, dec) repeat 6 times. (24)
- Rnds 29–30: sc around. (24)
- Rnd 31: 1 sc, dec, (2 sc, dec) ×5, 1 sc. (18)
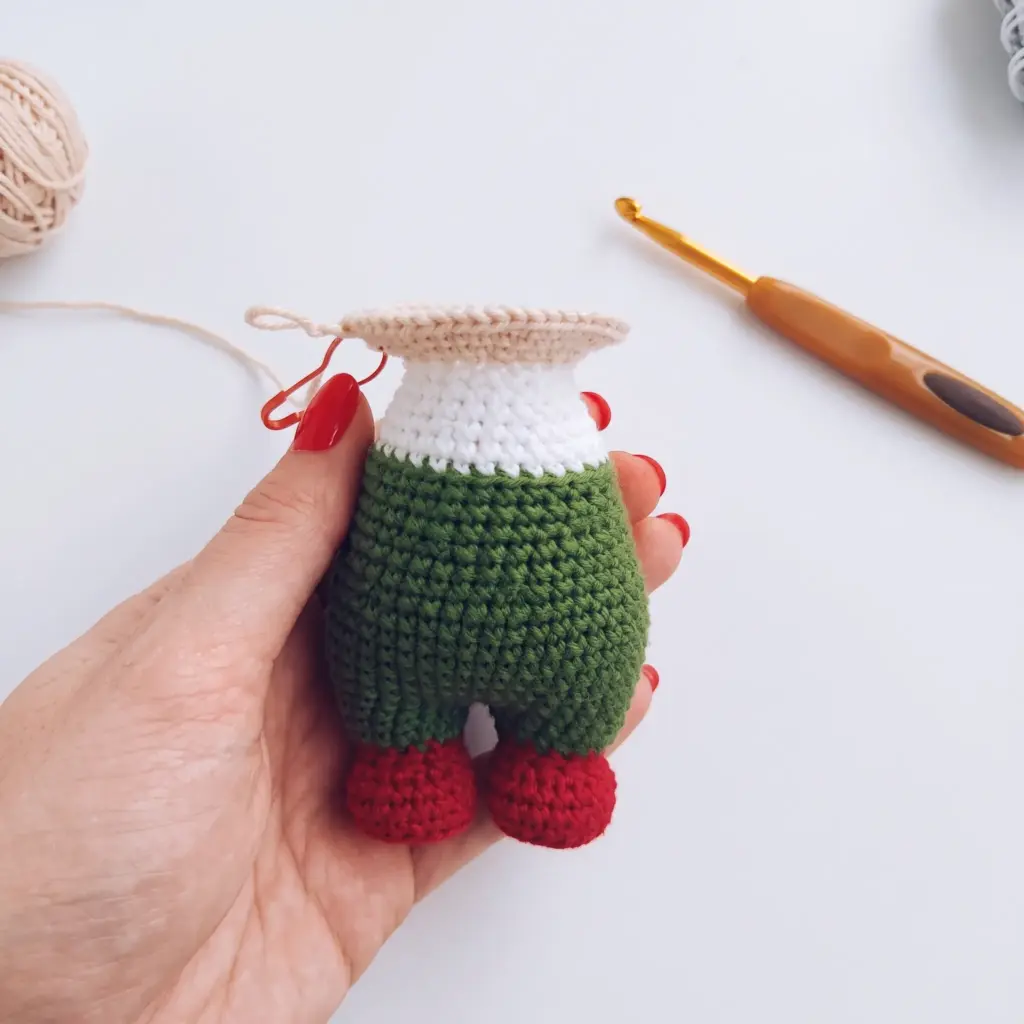
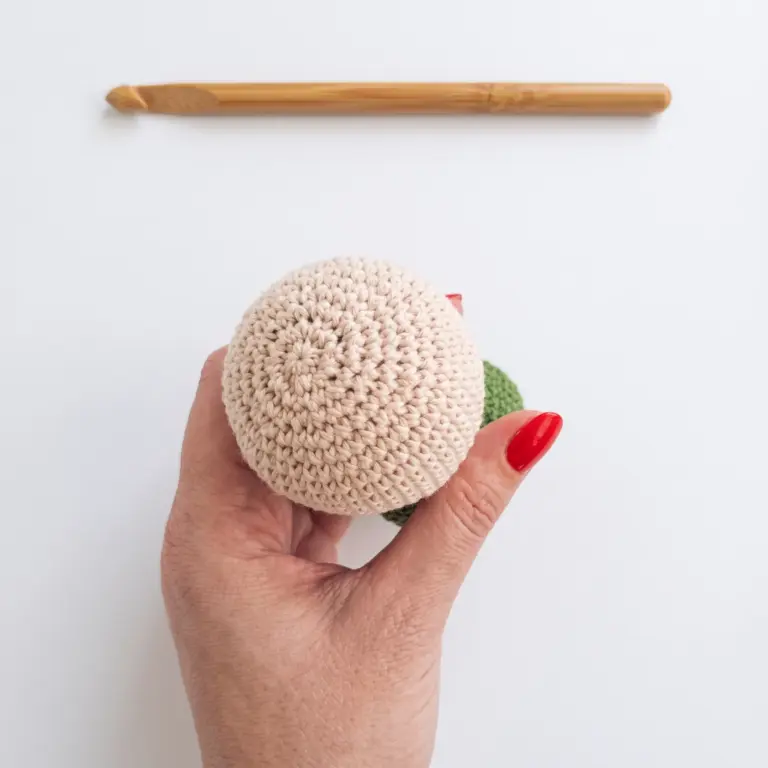
Head
Change to Beige.
- Rnd 32: sc around. (18)
- Rnd 33: inc around. (36)
- Rnd 34: (5 sc, inc) repeat 6 times. (42)
- Rnd 35: 3 sc, inc, (6 sc, inc) ×5, 3 sc. (48)
- Rnds 36–44: sc around. (48)
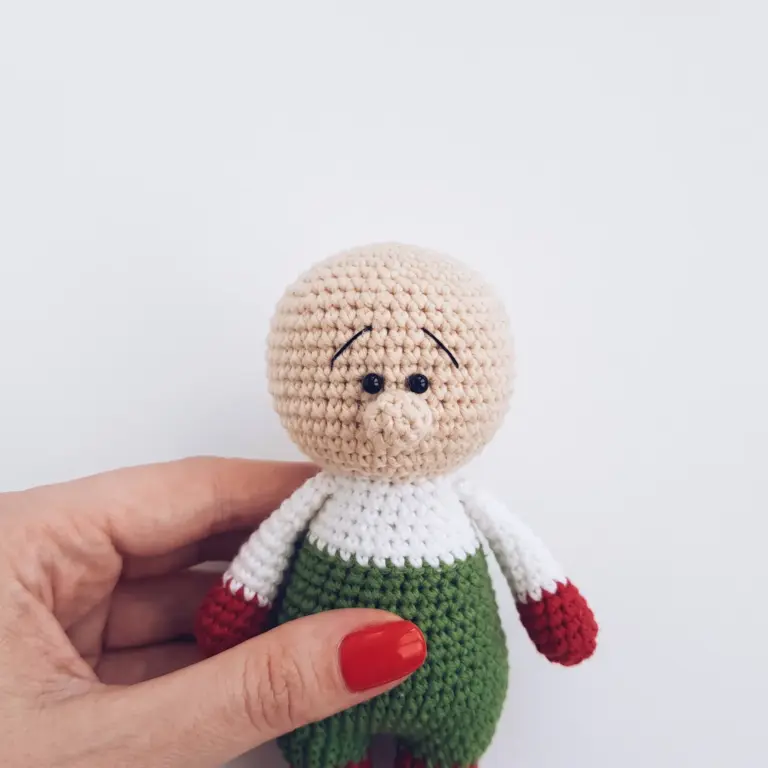
Place the safety eyes between Rounds 39 and 40, approximately 2 sc apart, before closing the head.
- Rnd 45: 3 sc, dec, (6 sc, dec) ×5, 3 sc. (42)
- Rnd 46: (5 sc, dec) ×6. (36)
- Rnd 47: 2 sc, dec, (4 sc, dec) ×5, 2 sc. (30)
- Rnd 48: (3 sc, dec) ×6. (24)
- Rnd 49: 1 sc, dec, (2 sc, dec) ×5, 1 sc. (18)
- Rnd 50: (1 sc, dec) ×6. (12)
Fasten off with a long tail. Close the remaining opening and weave the tail inside.
Nose
Use Beige and stuff lightly.
- Rnd 1: 6 sc in mr. (6)
- Rnd 2: inc around. (12)
- Rnd 3: dec 6 times. (6)
Fasten off, leaving a long sewing tail.
Arms — Make 2
Start with Dark Red.
- Rnd 1: 6 sc in mr. (6)
- Rnd 2: inc around. (12)
- Rnds 3–5: sc around. (12)
- Rnd 6: (4 sc, dec) repeat twice. (10)
Change to White.
- Rnds 7–11: sc around. (10)
- Rnd 12: (3 sc, dec) repeat twice. (8)
- Rnds 13–15: sc around. (8)
Flatten the opening and work 4 sc through both layers. Fasten off with a long tail for sewing.
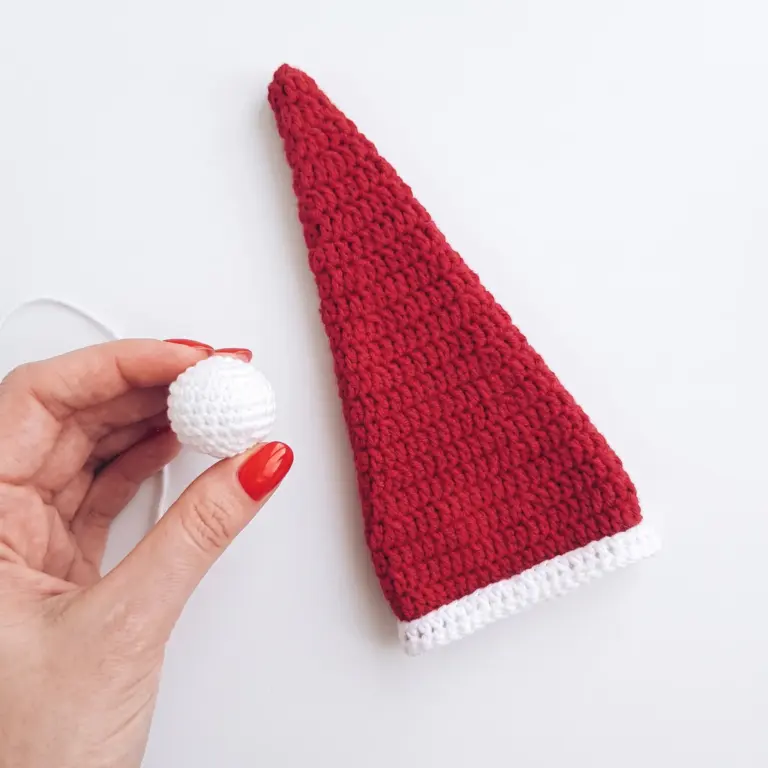
Hat
With White, ch 44 and join with a sl st to form a ring.
- Rnd 1: ch 2 (counts as first dc), dc in each ch around, sl st to join. (44)
- Rnd 2: ch 1 (counts as first sc), sc around, sl st to join. (44)
Change to Dark Red. From this point, begin each round with ch 2 and finish with a sl st join.
- Rnd 3: dc FLO around. (44)
- Rnds 4–5: dc around. (44)
- Rnd 6: (20 dc, dec) ×2. (42)
- Rnd 7: 10 dc, dec, 19 dc, dec, 9 dc. (40)
- Rnd 8: (18 dc, dec) ×2. (38)
- Rnd 9: 9 dc, dec, 17 dc, dec, 8 dc. (36)
- Rnd 10: (16 dc, dec) ×2. (34)
- Rnd 11: 8 dc, dec, 15 dc, dec, 7 dc. (32)
- Rnd 12: (14 dc, dec) ×2. (30)
- Rnd 13: 7 dc, dec, 13 dc, dec, 6 dc. (28)
- Rnd 14: (12 dc, dec) ×2. (26)
- Rnd 15: 6 dc, dec, 11 dc, dec, 5 dc. (24)
- Rnd 16: (10 dc, dec) ×2. (22)
- Rnd 17: 5 dc, dec, 9 dc, dec, 4 dc. (20)
- Rnd 18: (8 dc, dec) ×2. (18)
- Rnd 19: 4 dc, dec, 7 dc, dec, 3 dc. (16)
- Rnd 20: (6 dc, dec) ×2. (14)
- Rnd 21: 3 dc, dec, 5 dc, dec, 2 dc. (12)
- Rnd 22: (4 dc, dec) ×2. (10)
- Rnd 23: 2 dc, dec, 3 dc, dec, 1 dc. (8)
- Rnd 24: (2 dc, dec) ×2. (6)
Fasten off with a long tail, close the opening, and weave the end inside the hat.
Pom-Pom
Use White and stuff as you work.
- Rnd 1: 6 sc in mr. (6)
- Rnd 2: inc around. (12)
- Rnd 3: (1 sc, inc) ×6. (18)
- Rnd 4: (2 sc, inc) ×6. (24)
- Rnds 5–8: sc around. (24)
- Rnd 9: (2 sc, dec) ×6. (18)
- Rnd 10: (1 sc, dec) ×6. (12)
Fasten off, leaving a long tail for sewing.
Assembly & Finishing
- Pin the arms evenly to both sides of the body and sew them securely in place.
- Position the nose just below the eyes and sew it onto the face.
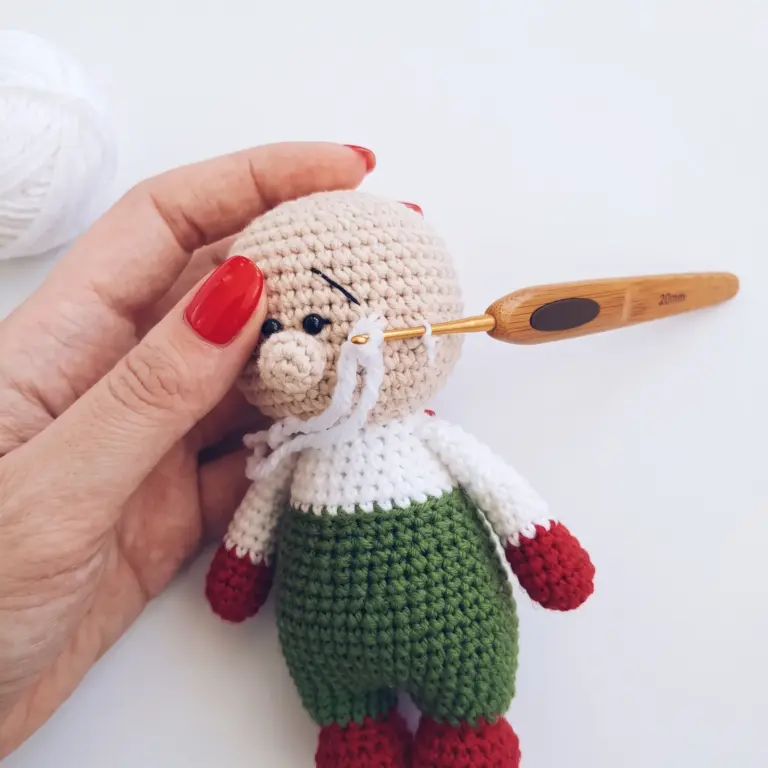
- Cut 19 pieces of fuzzy white yarn, each approximately 12 cm (4.75 in) long. Attach them around Round 38 to create the beard: about 7 strands on either side of the nose and 5 beneath it. Add another row if you prefer a fuller beard, then trim it neatly.
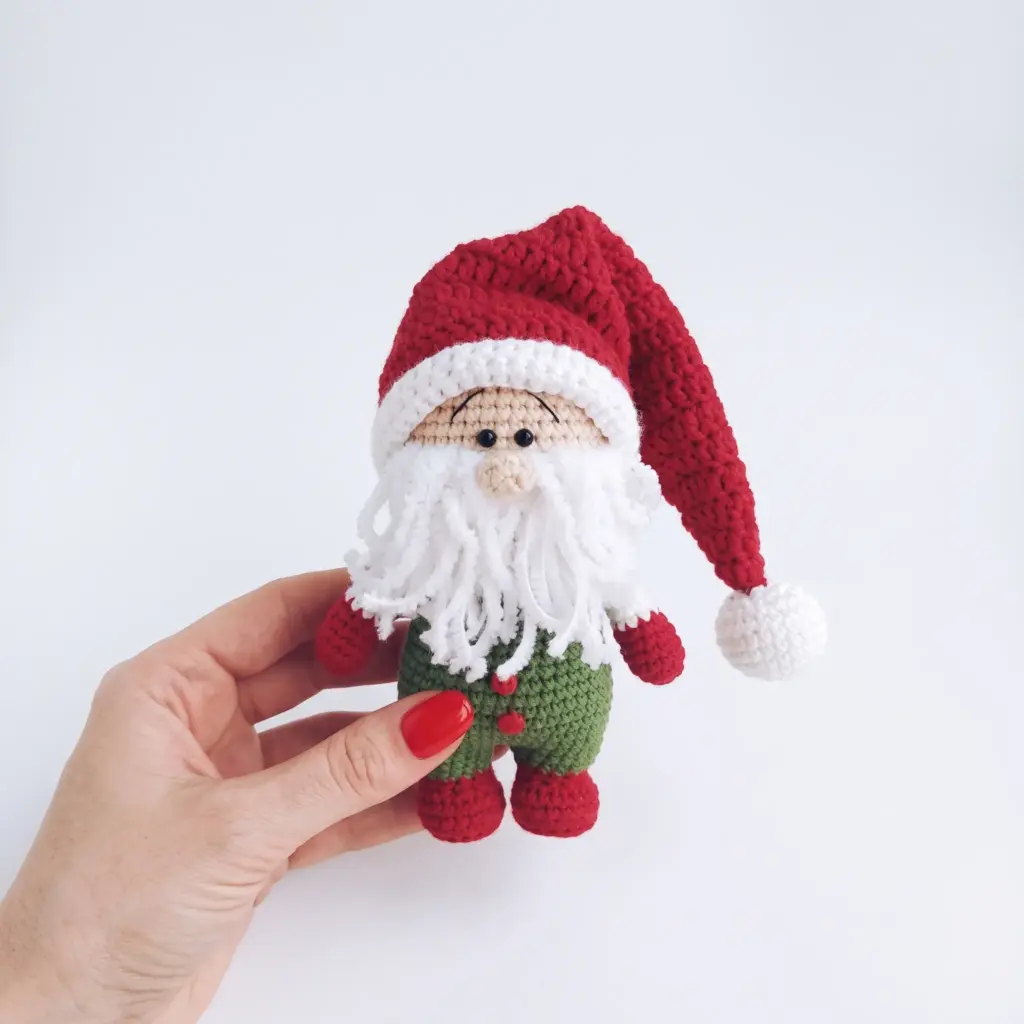
- Sew the pom-pom securely to the tip of the hat.
- Fold the white brim upward and place the hat on the head. Adjust it until the shape and tilt look natural.
- Sew the two decorative buttons onto the front of the body.
- Weave in all remaining yarn ends.
Tips for a Neat Finish
Keep your crochet tension firm and consistent so the fiberfill stays hidden. Invisible decreases are especially useful on the head and body because they create smoother shaping with less visible bulk.
Take extra care when joining the legs. Both feet should face the same direction before you continue into the body. When attaching the arms and other pieces, pin them in place first so you can check their symmetry before sewing.
Frequently Asked Questions
What skill level is this Christmas gnome pattern?
This project is best suited to an intermediate crocheter or a confident beginner who already understands working in the round, increases, decreases, color changes, and basic amigurumi assembly.
How tall is the finished gnome?
The finished gnome is approximately 5 inches (13 cm) tall, not including the long hat.
Are the plastic foot soles required?
No. They are optional and are simply used to give the feet additional structure and stability.
Can I substitute another yarn?
A similar worsted-weight cotton or cotton-blend is the safest substitute. Changing yarn weight or hook size can change the final size and appearance of your gnome.
Your Christmas Gnome Is Finished!
Once the beard is trimmed, the buttons are attached, and that long festive hat is sitting just right, your little Christmas gnome is ready for the holidays. Add him to your seasonal decorations, make one as a handmade gift, or experiment with different color combinations to create your own little collection.
Happy crocheting! If you enjoyed this pattern, you might also like our Ushanka Snowman Amigurumi or Kiki the Koala Amigurumi patterns, or browse more beginner crochet patterns for your next project.
